Create an XR scene
This document describes how to upgrade the XR Interaction Toolkit and then create a basic XR scene with an XR camera, floor, handgrips, and rays, as shown in the following figure.

Step 1: Add XR Interaction Toolkit.
Building a basic XR scenario requires the basic functions and components provided by Unity. Among them XR Interaction Toolkit is the advanced toolkit provided by Unity, which contains many cross-platform XR interactive functions.
From the upper menu bar, select Windows > Package Manager.
In the Package Manager window, click Packages > Unity Registry.
The list shows the toolkits that are available in the Unity Registry.
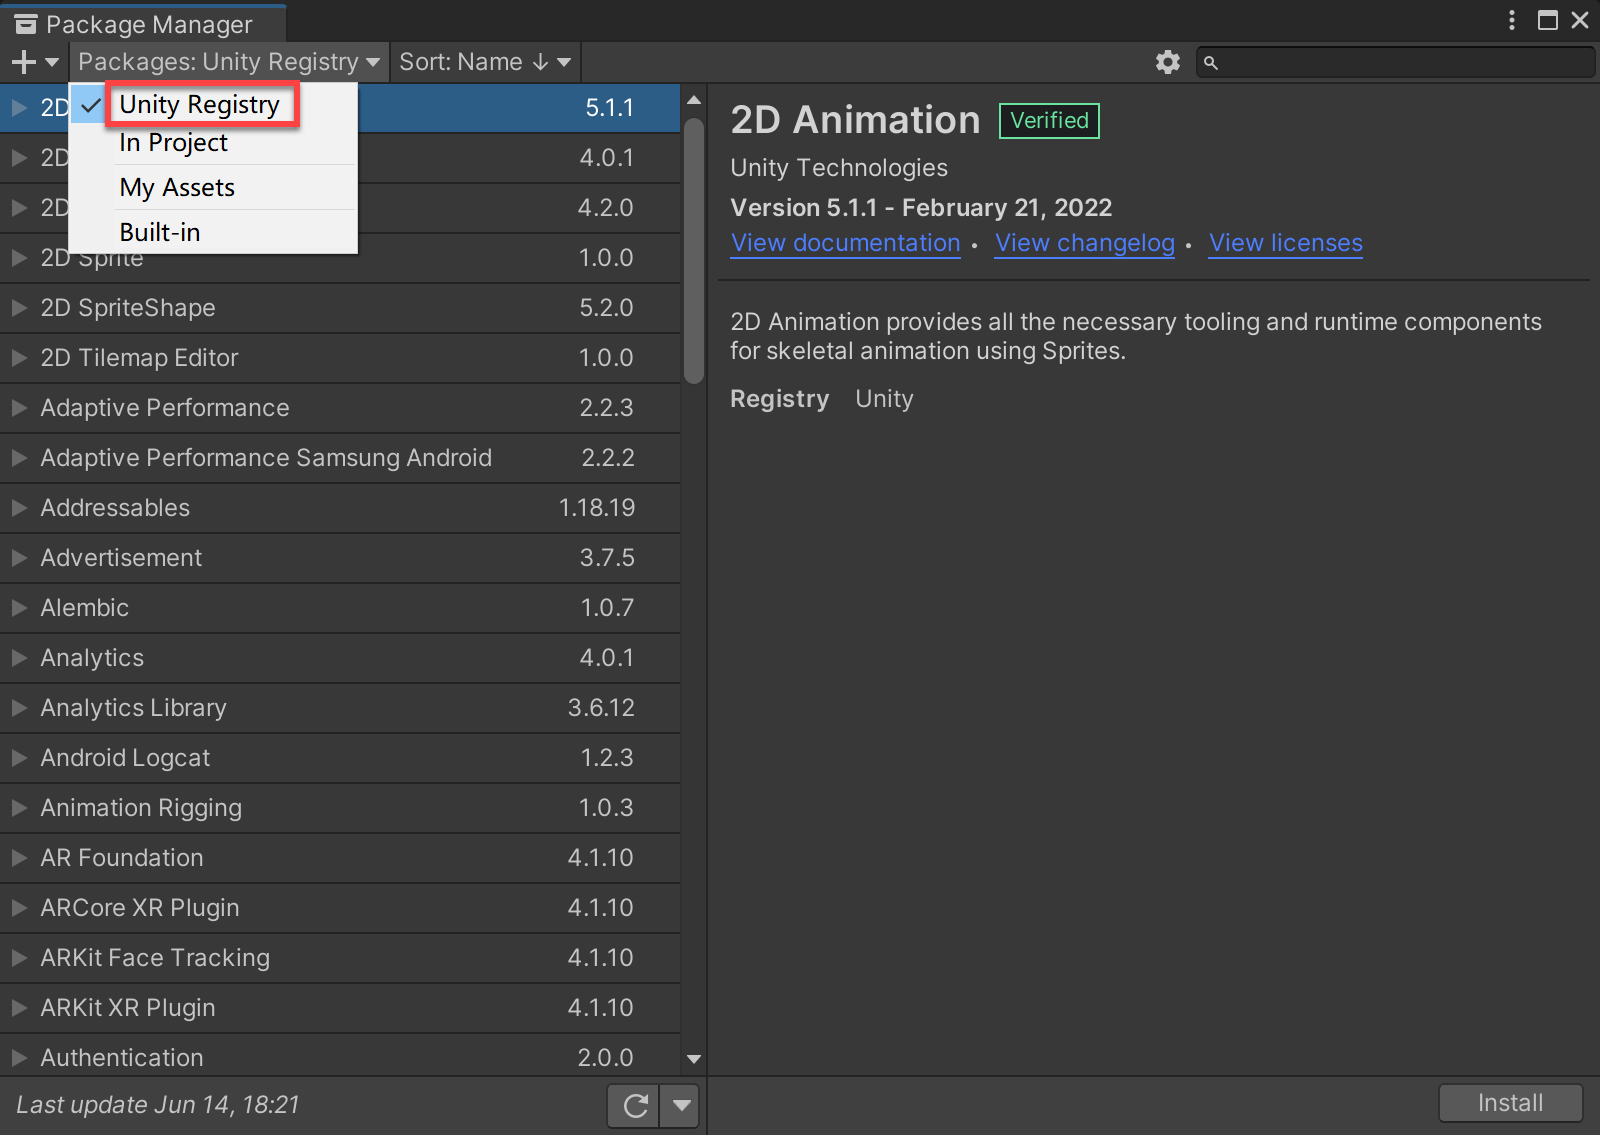
Find XR Interaction Toolkit it in the list and expand it.
You will see the latest version of the toolkit.
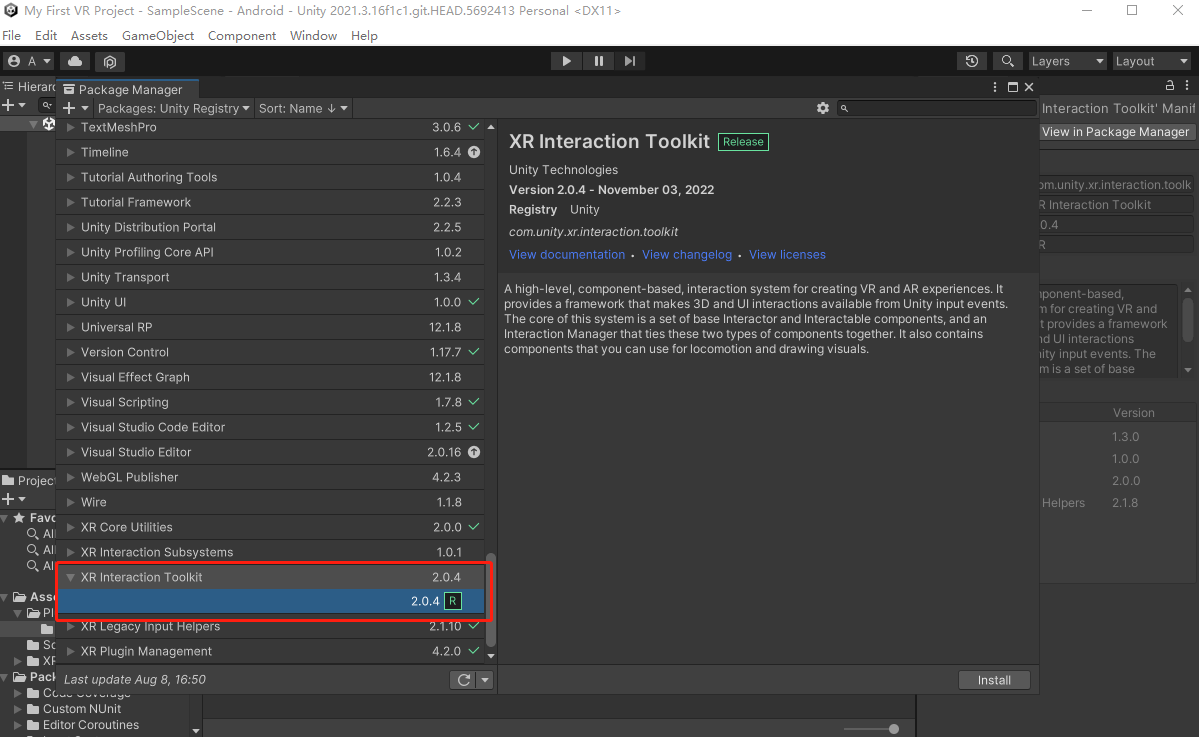
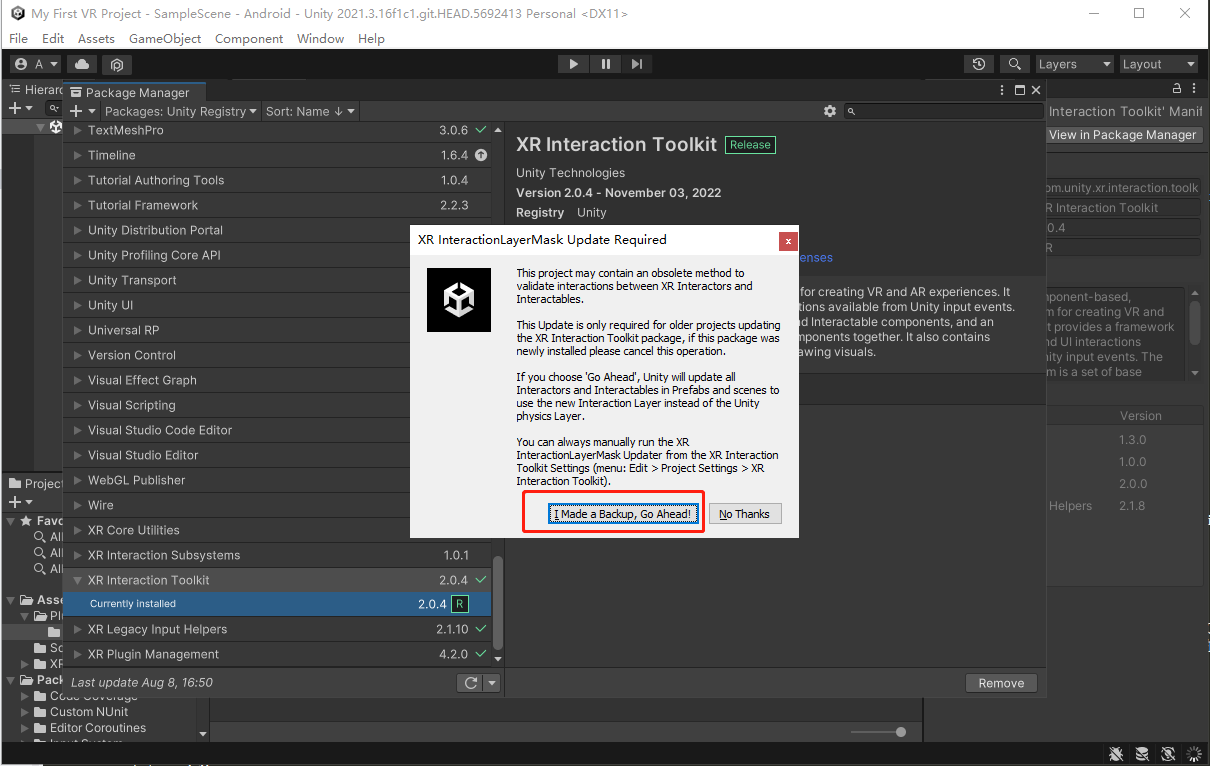
Click install to install. It may pop up that the interactive layer needs to be upgraded. Click I Made a Backup, Go Ahead.
Go Windows again > Package Manager > XR Interaction Toolkit.
Expand the panel on the right Samples and click Import Import Starter Assets, XR Device Simulater..

The description of each Sample file is as follows:
Sample file Explain Starter Assets The sample file is located in the Assets/Samples/XR Interaction Toolkit/ [version]/Starter Assets directory by default, and provides a set of sample configuration files. Includes a set of default input actions and presets. XR Device Simulator XR Device Simulator, which provides assets for simulating XR headsets and handles, and is located in the Assets/Samples/XR Interaction Toolkit/ [version]/XR Device Simulator directory by default. The sample file allows manipulation of the headset and the joystick by mouse and keyboard input. The folder contains a sample Binding for use with the simulator, as well as a prefab that you can quickly use in your scene.
Step 2: Add XR Camera
When you create a new project, Unity has created and opened a SampleScene in the project by default. The SampleScene contains only Directional Light and a Main Camera.
Cameras can capture virtual worlds and display them on displays. By customizing the camera parameters and manipulating the camera, the application can present a unique picture. Scenes have no limit on the number of cameras. You can set the position and rendering order of each camera so that it can render the entire scene, or only part of the scene, in any order, anywhere on the screen.
If you want to display the 3D VR picture correctly on the head, you need to add a normal camera for the left and right eyes. The XR camera is a default component in the XR Interaction Toolkit, which can render the left and right eye pictures at the same time and present them on the head. In addition, as the foundation of the XR application experience, the XR camera is capable of 3D oF or 6 DoF movement as the head and body move.
Replace the normal camera in the scene with the XR camera as follows:
In the Hierarchy window, right-click the Main Camera default addition, and then click Delete Delete.
Click + > XR > XR Origin(Action-based) to XR Origin add to the scene.
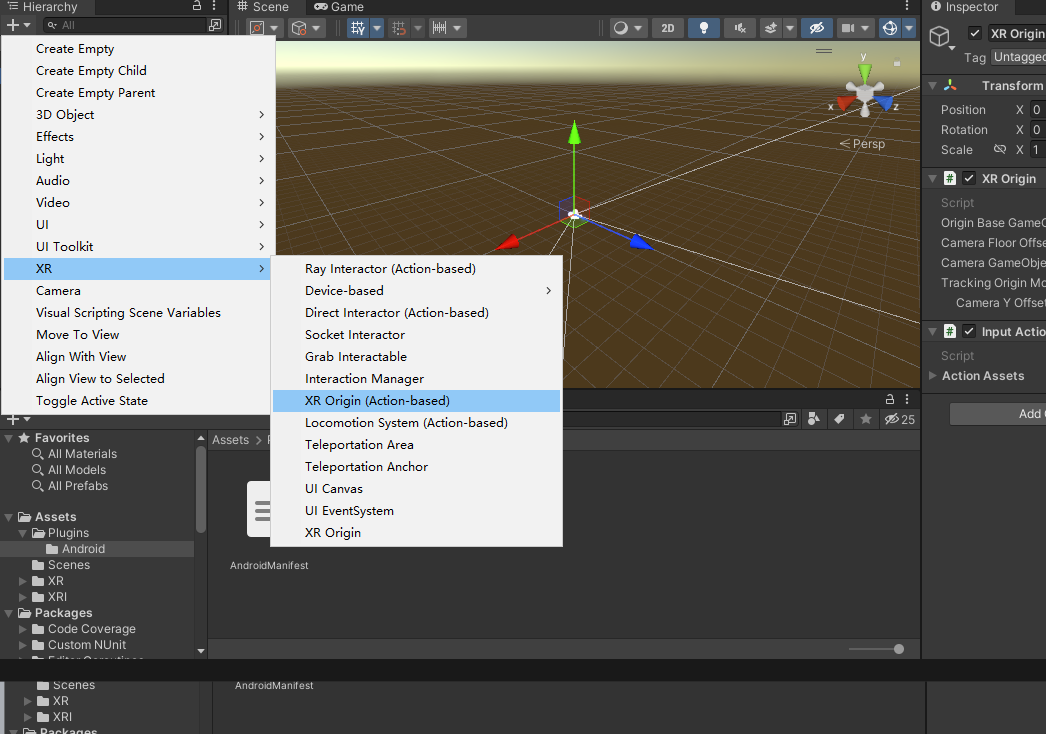
The XR Origin object contains the following elements:
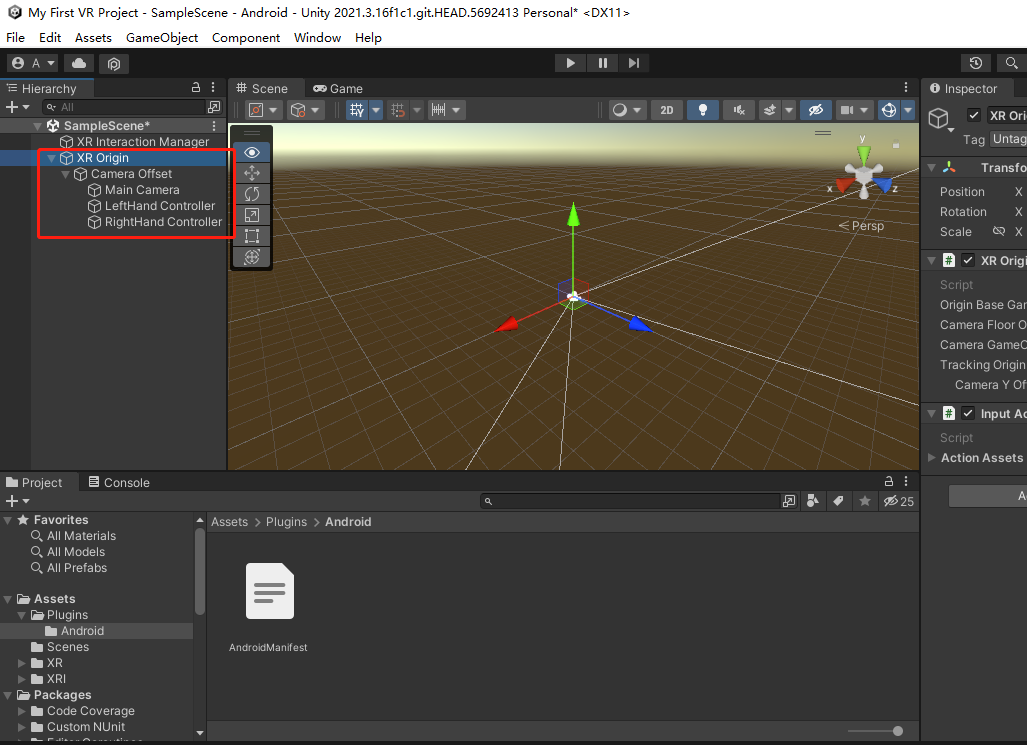
Element Explain XR Origin The main object is responsible for mounting the management control script. Camera Offset Synchronize the headset 6 Dof data to allow the camera and joystick to move through the scene. Main Camera The main camera is responsible for capturing and generating the picture displayed on the display. LeftHand Controller Left-handed handle node. RightHand Controller Right-handed handle node. Selected XR Origin. The XR Origin mounted components and scripts are displayed in the
Inspector window.
Step 3: Add the ground
In the Hierarchy window, click + > 3D Object > Plane.
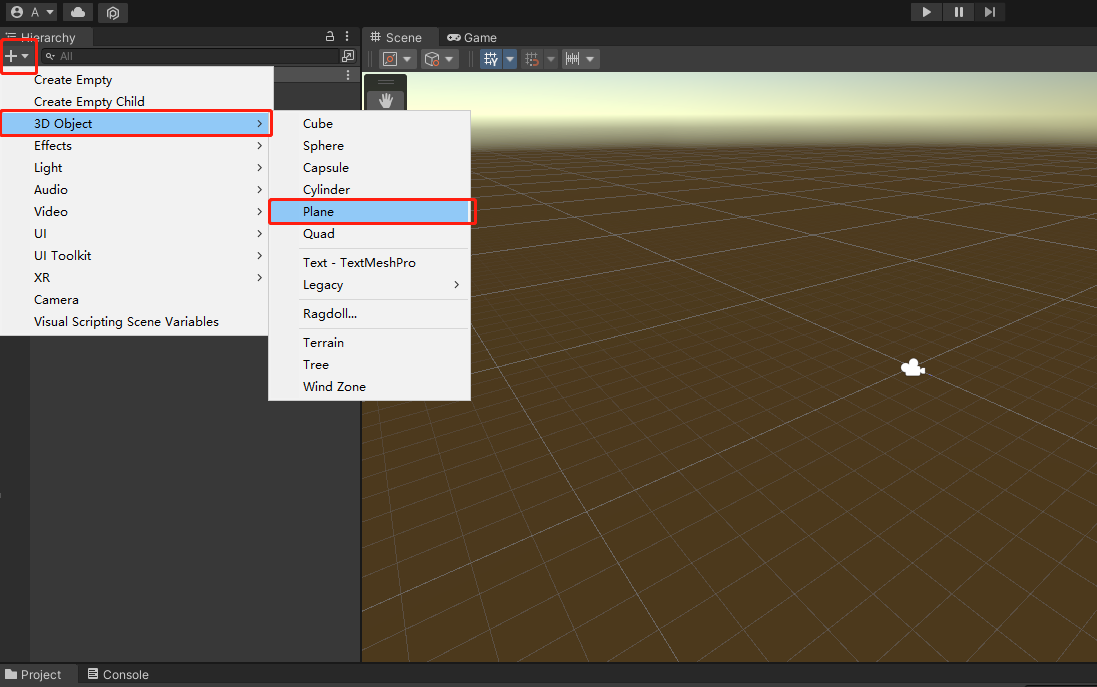
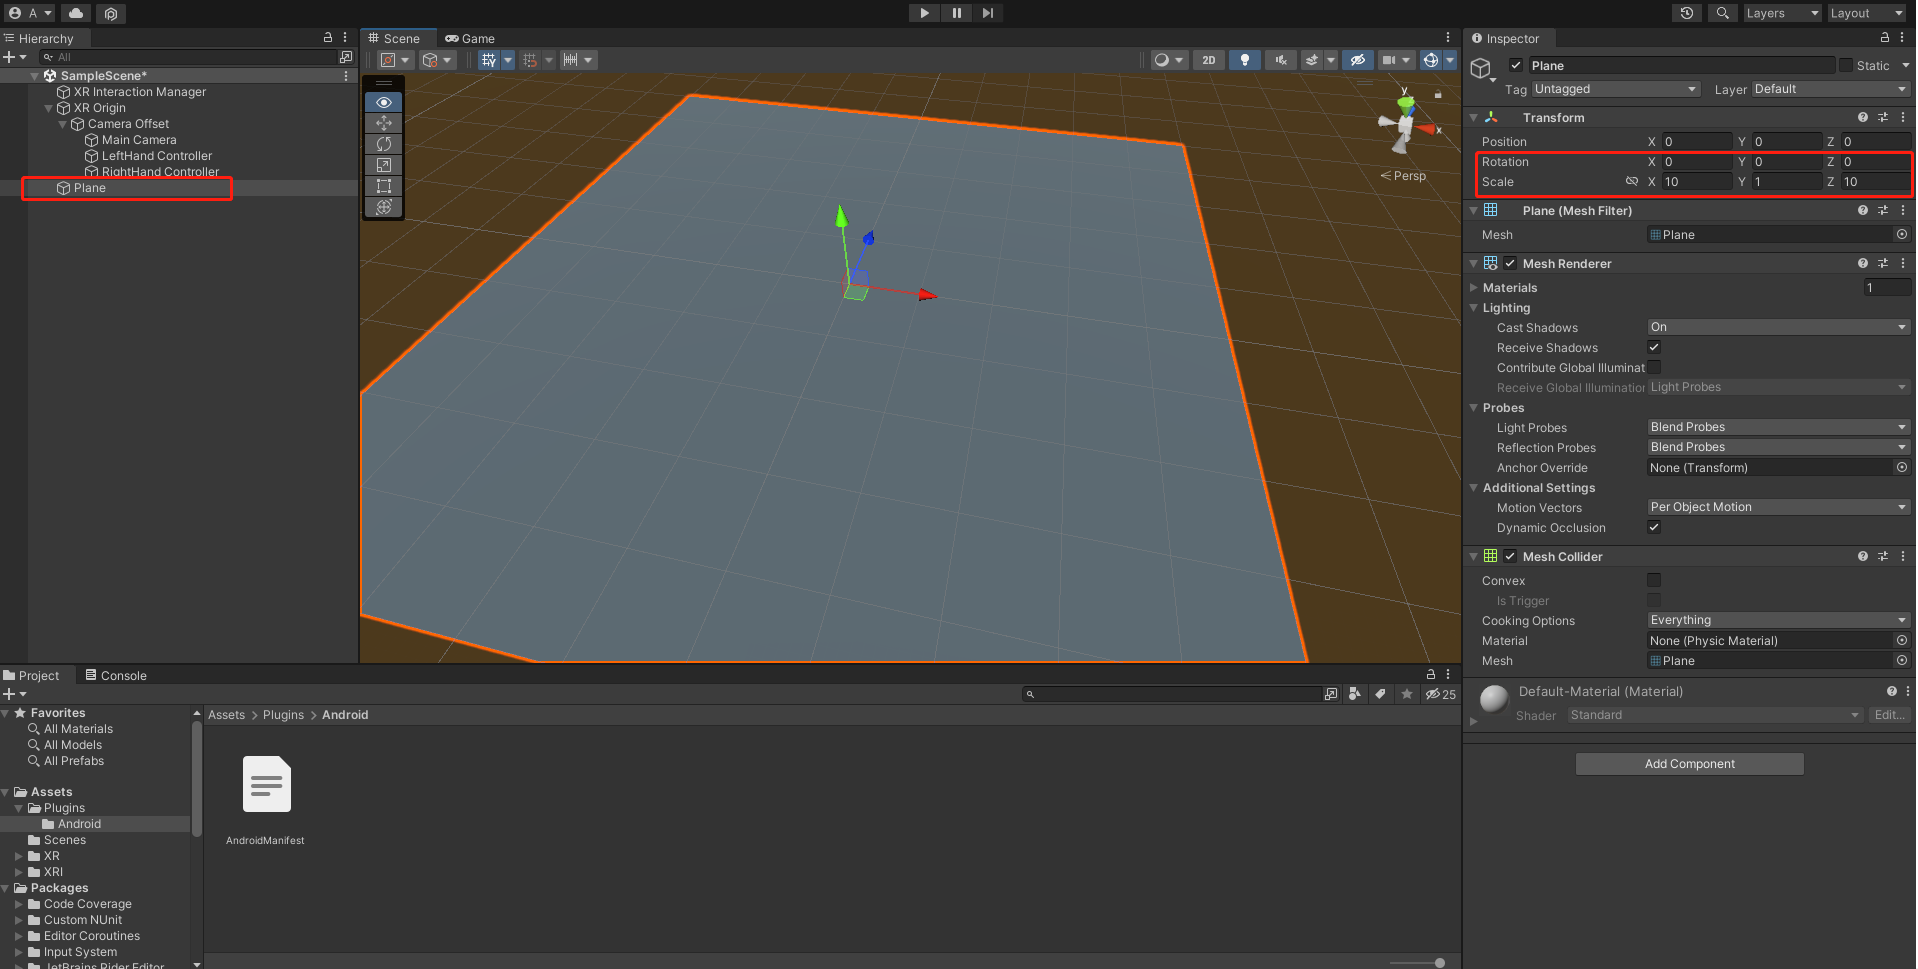
A white default plane is added to the scene. When selected Plane, Inspector the properties of the object are displayed Plane in the window.
At the Transform component, do the following:
a. Set the Position property to (0, 0, 0). This value is generally set by default.
b. Set the Scale property to (10, 1, 10).
The scene has a 10x10 ground centered on the world coordinate origin.
Step 4: Configure the handle
In addition to the XR camera, the handle is also an important part of the XR application. Users can interact with the virtual world through the handle and enjoy the immersive XR experience. Default handle models are provided for developers in the PANCAKE Unity SDK Sample, including Svr6dofControllerLeft and Svr6dofControllerRight. You can add them to an app and have them move with the movement of a real handle.
Follow these steps to configure the PANCAKE default handle model:
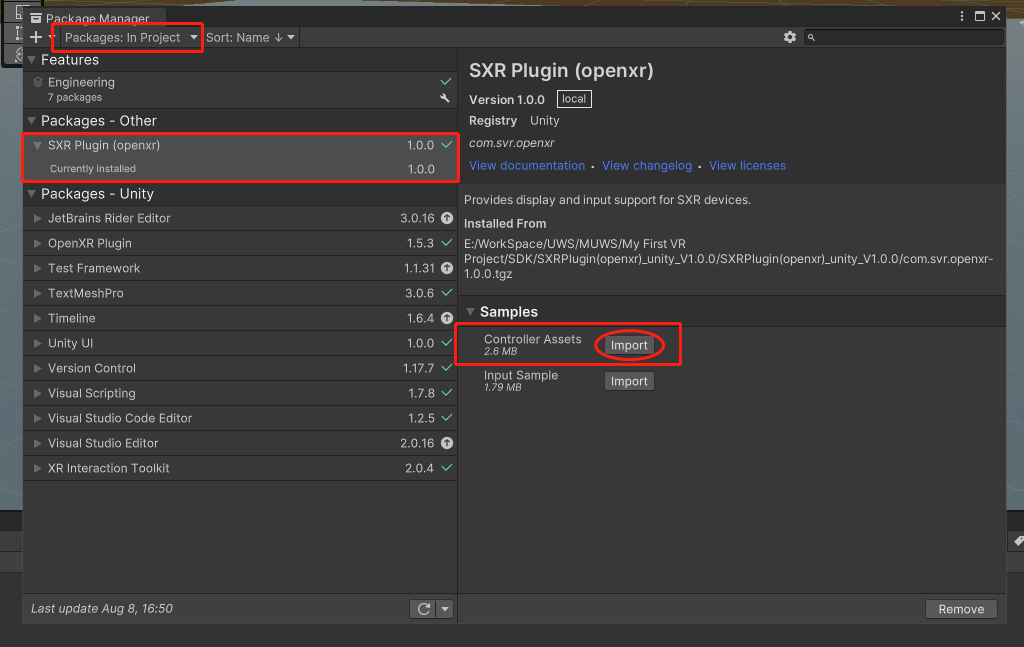
Select Package:In Project > SXR Plugin(openxr) > Controller Assets in Window > Package Manager and click import to import the handle model.
In the Hierarchy window, expand XR Origin > Camera Offset.
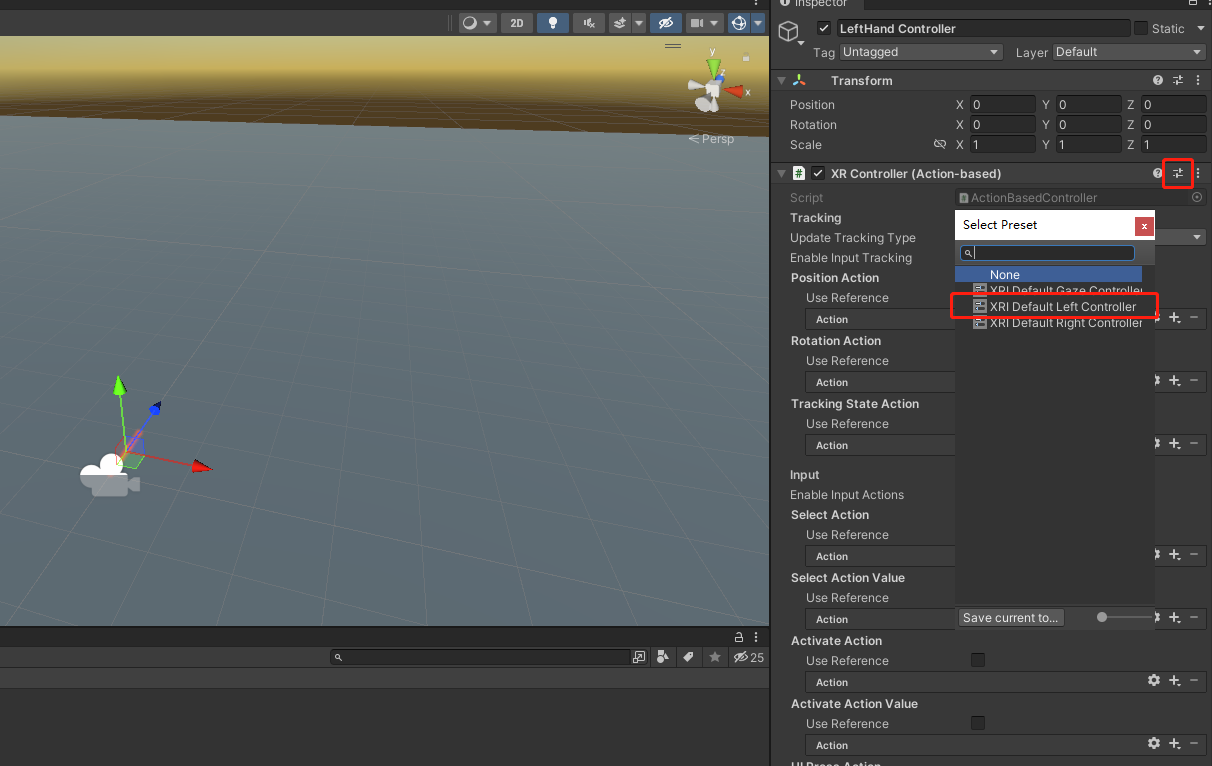
Selected LeftHand Controller.
In the Inspector window, click XR Controller (Action-Based) the icon in the upper right corner Preset of the panel, and you will see Select Preset the window. Double-click the add XRI Default Left Controller settings file to import the default left handle settings.
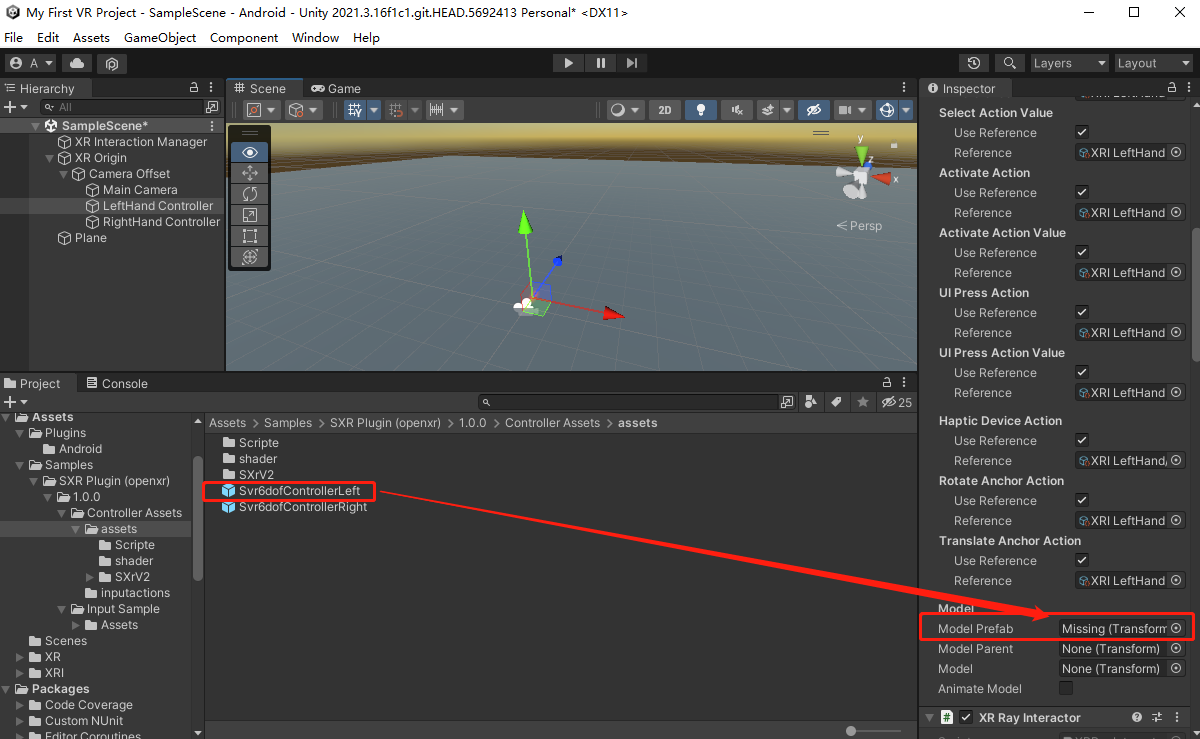
Locate Model Prefab the settings item in the XR Controller (Action-Based) script area.
In the Project window, Go to Assets > Samples > SXR Plugin (openxr) 1.0.0 Controller Assets > > > assets and Svr6dofControllerLeft drag to Model Prefab the.
Follow the same steps to configure RightHand Controller.
Since the The latest Unity input system PANCAKE Unity SDK uses, you need to add Input Action Manager a script to control the input, as follows:
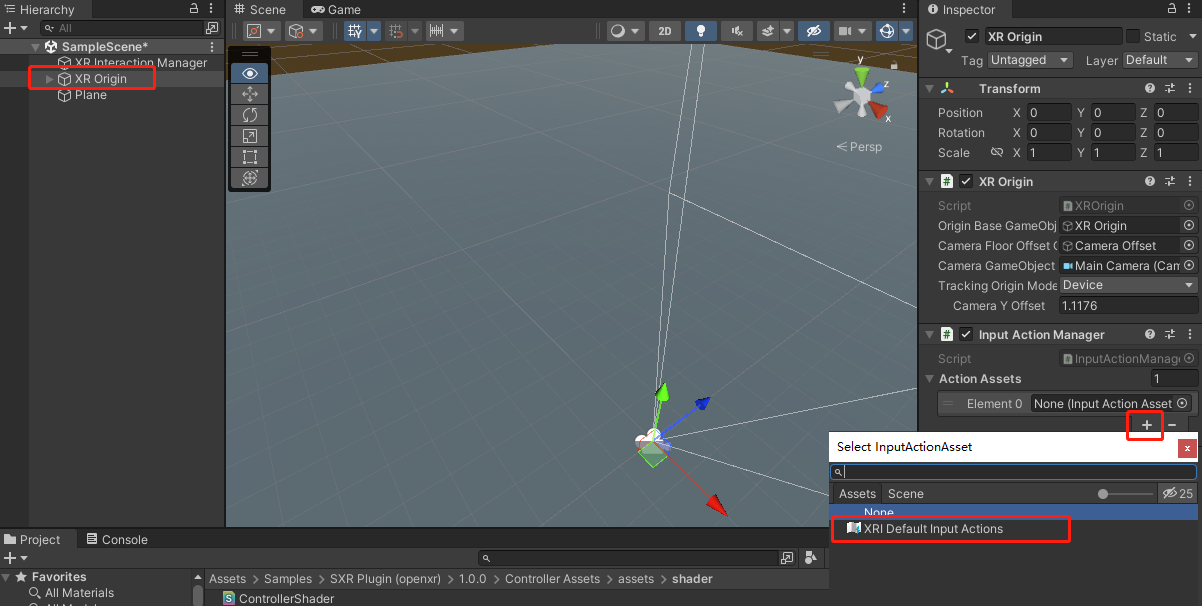
In the Hierarchy window, select XR Origin.
In the Input Action Manager Scripts area, expand Action Assets the list, and then click + Add Element 0 CI.
Click the circle icon. You will see Select InputActionAsset the window.
Double-click XRI Default Input Actions to add it to the Element 0 CI.
At this point, the construction of the basic XR scene is completed.
Subsequent operations
Refer to the Pack and run the scene documentation to package the XR scene as an APK file and run it on the PANCAKE device.